
Upload orders
- How-to
- Orders
- Checked on 28 October 2026
Send your 3PL a day's orders in one CSV file, check what will happen to each order, then confirm to send them.
In short
Go to Orders, select Upload orders, choose your CSV file and select Check file. Read what will happen to each order, then select Confirm and take in.
Before you start
You need to be a Client User or a Client Account Administrator. A Client Viewer doesn't see Upload orders.
Save your spreadsheet as a CSV file, with the column headings in its first row and one row for each order line. A file can have up to 5,000 rows.
The file
A file with these headings is read as it is. Capitals, spaces and underscores in a heading don't matter.
| Column | Needed | What it takes |
|---|---|---|
client_order_reference |
Yes | Your own reference for the order, such as HB-W-10270 |
product_code |
Yes | The product's SKU, such as HB-MINT-LIP-10 |
quantity |
Yes | A whole number above zero |
recipient |
No | Who the order goes to |
company |
No | The recipient's company |
email |
No | The recipient's email |
phone |
No | The recipient's phone number |
address_line_1 |
No | The first line of the address |
address_line_2 |
No | The second line |
town |
No | The town or city |
county |
No | The county |
postcode |
No | A UK postcode, such as LS1 1UR |
country |
No | GB or IM. Left blank, it is GB. |
service_level |
No | A Service Level, such as Next Day. Left blank, your Default Service Level is used. |
Rows with the same Client Order Reference make one order. Give the delivery details on its first row; later rows of the order may leave them blank.
Steps
Check the file
-
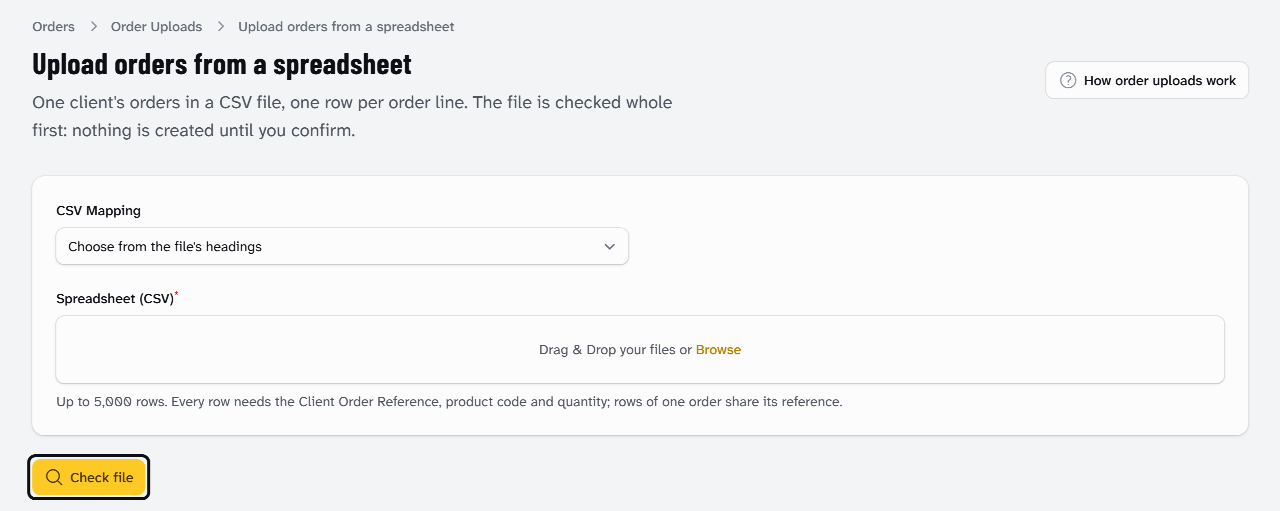
Go to Orders and select Upload orders.
-
Leave CSV Mapping as Choose from the file's headings.
-
Under Spreadsheet (CSV), select Browse and choose your file, or drag it in.
-
Select Check file. You see "File checked" and the Order Upload's page opens. Nothing is sent yet.
Map your shop's own headings
If your file has its own headings, such as Order No from your shop, you are asked to map them the first time:
- Under Map the file's columns, enter a Name for this mapping, such as your shop's name.
- For each field, choose your file's heading for it, such as Order No for Client Order Reference. Leave Not in this file for any it doesn't have.
- If your file writes Service Levels its own way, select Add a value. Enter it in Value in the file, such as
NDD, and choose its Service Level. - Select Save mapping and check. This CSV Mapping reads your next file with these headings without asking.
Read the check and confirm
The page lists each order with its Rows in the file, Outcome and Reasons:
- Taken in: it will be taken in as normal.
- Taken in and held: it will be taken in, then held until the reason is fixed.
- Refused: it won't be taken in, for the reasons shown.
- Duplicate: you used its reference before, so it is left out unless you tick This is a new order.
- To keep a copy, select Download with results. You get your file back with a Result column, such as "Will be taken in."
- Select Confirm and take in, then Confirm. A large file takes a minute or two.
Only the person who uploaded a file can confirm it.
What happens next
You see "Upload confirmed" with the number of orders taken in, and the Order column shows each order's ORD number. Refused orders, and duplicates you left unticked, are not sent.
The orders show under Orders. A held order waits until you fix it: see Why your order is held. To send a refused order, correct its rows and upload a file of those orders only.
Orders › Order Uploads lists your uploads, with how many orders each took in, held and refused.
Questions about your stock or deliveries go to your account manager.
Still stuck? Contact your 3PL's account manager.